Making a rustic oak bed – May ‘14
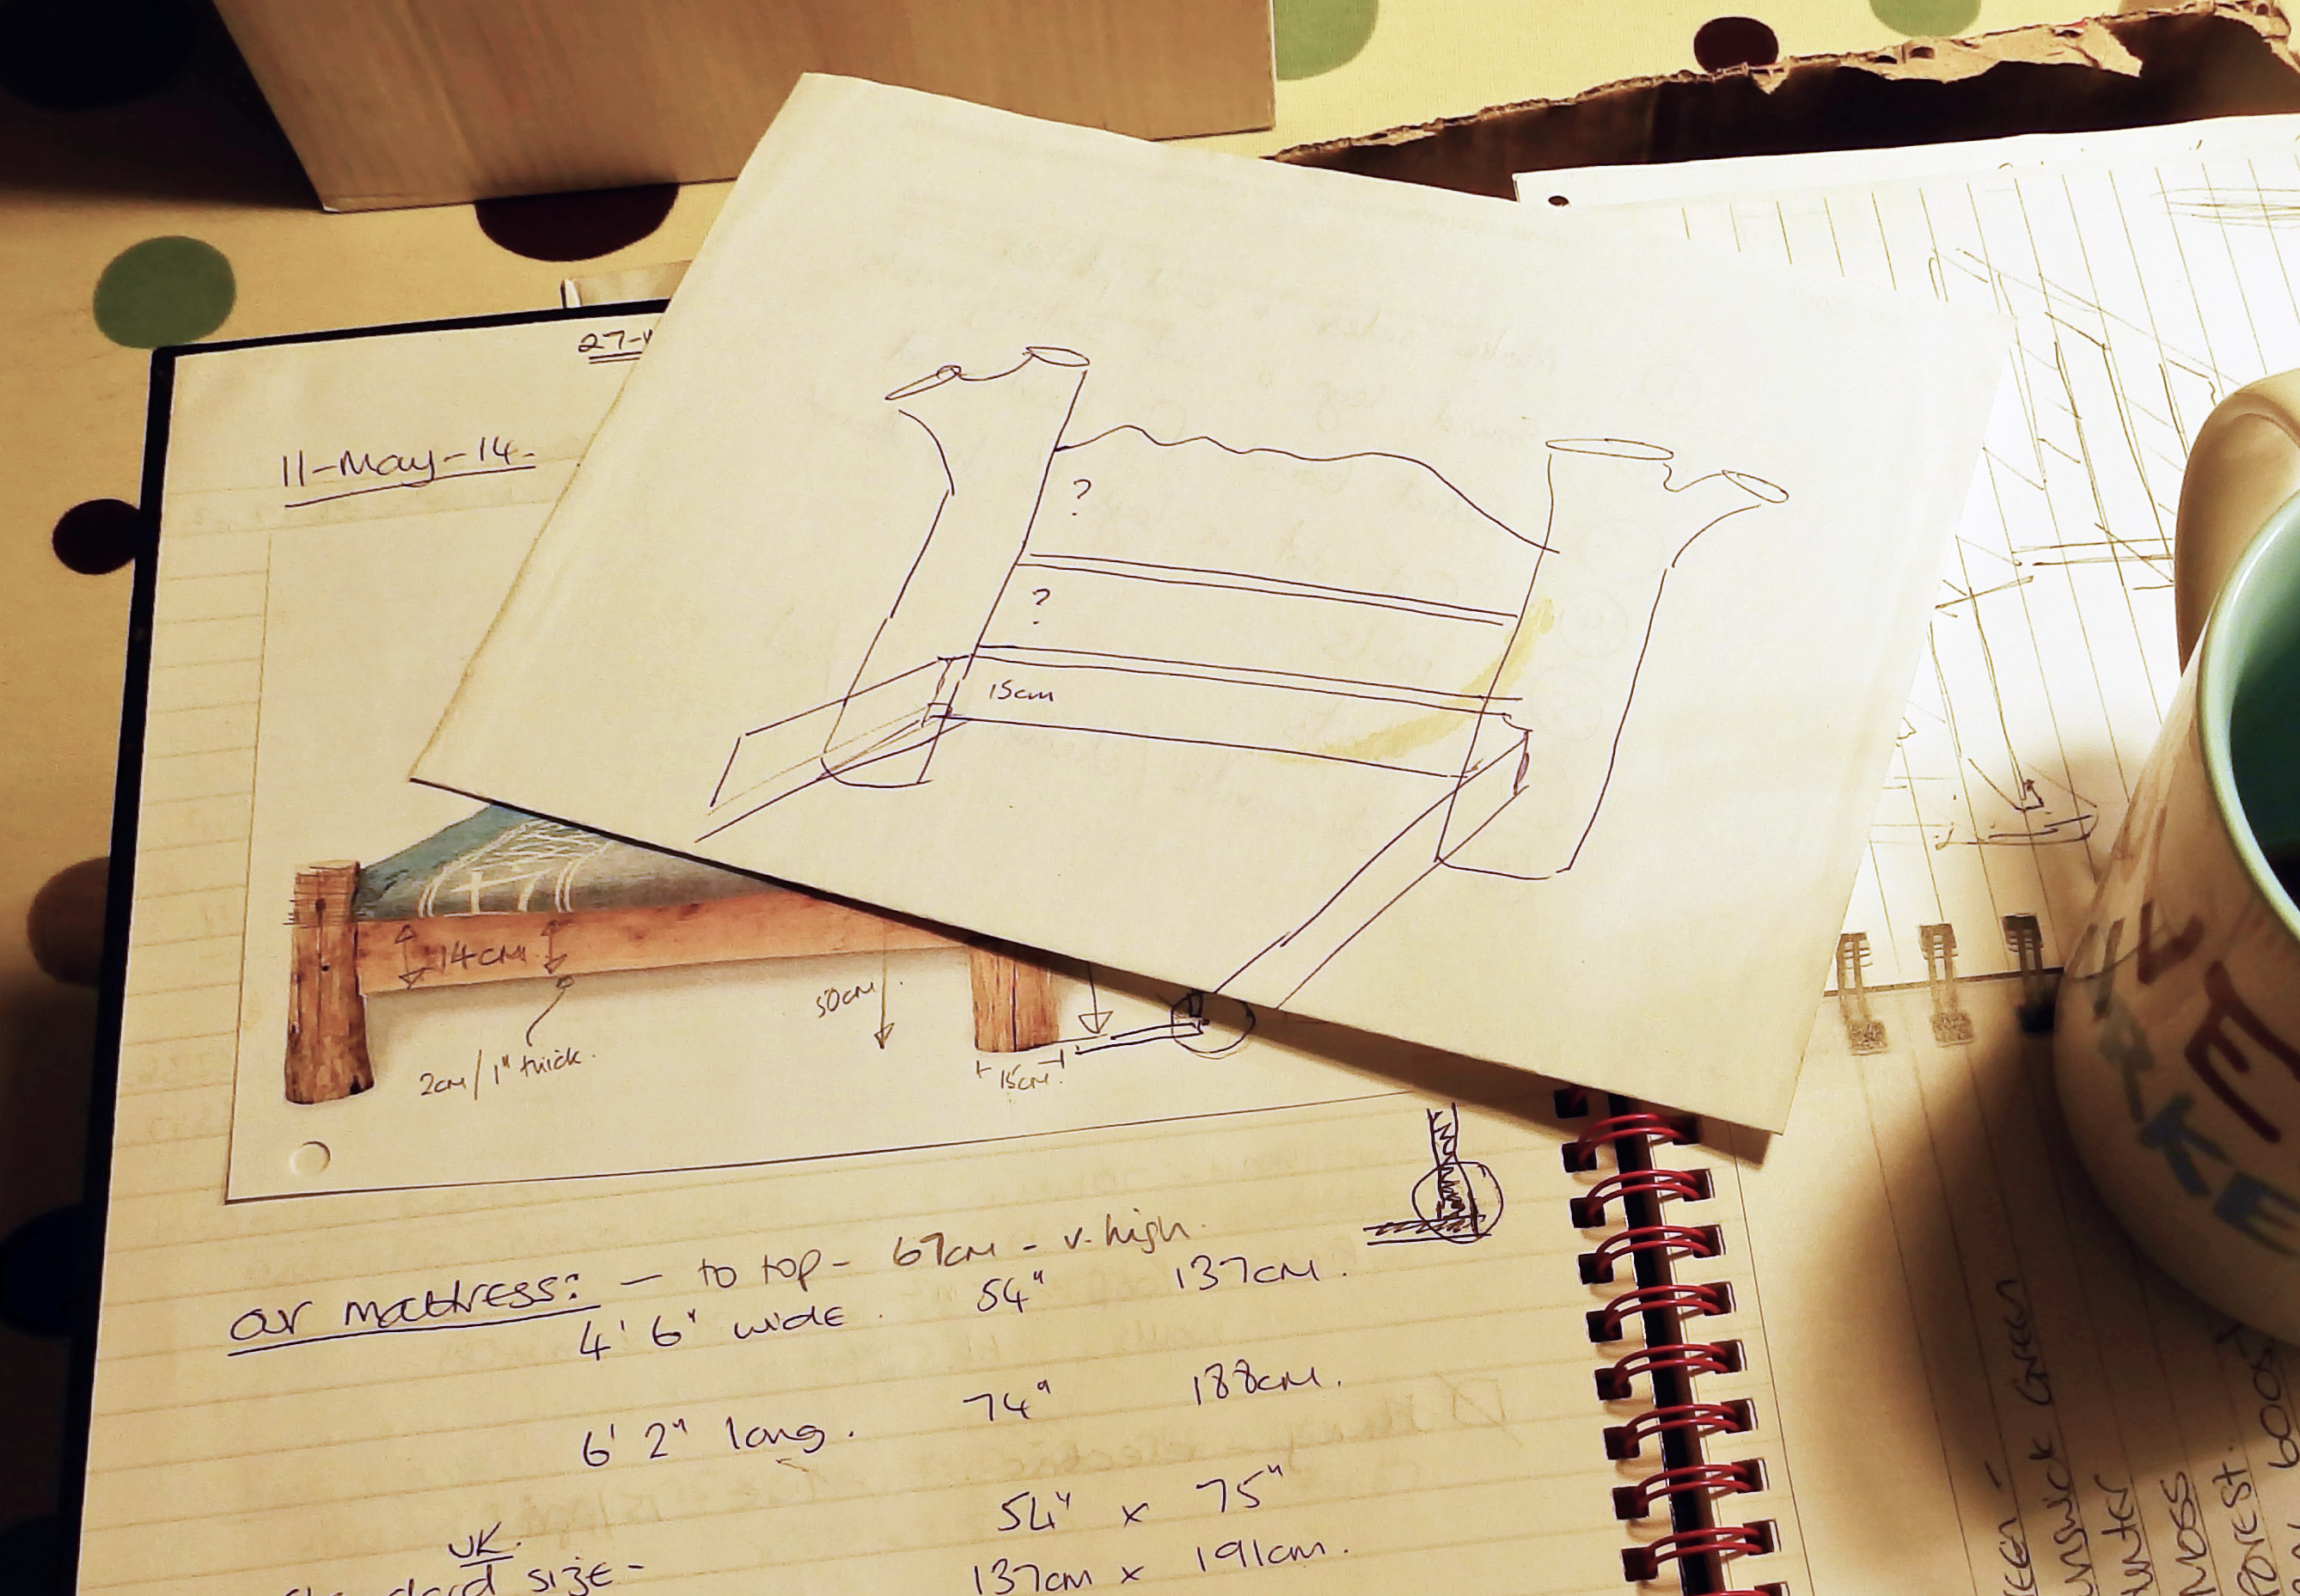
It started, as is so often the case, with a picture clipped from some designer home magazine or other. Accompanied with, of course, the inevitable ponderous question: “Couldn’t you make one of those?”
This time it was a bed, with big slabs of sawn log for the headboard, and small sections of trunk set vertical for the legs. To be fair we were in the market for a new bed to go in a Showman’s Caravan restoration we were just starting, and something like the one in the clipping would be quite a striking piece if we could pull it off. Space was going to be a restricting factor, so we couldn’t really get away with full sections of trunk for legs, but something “in the spirit of” would still be quite acceptable.
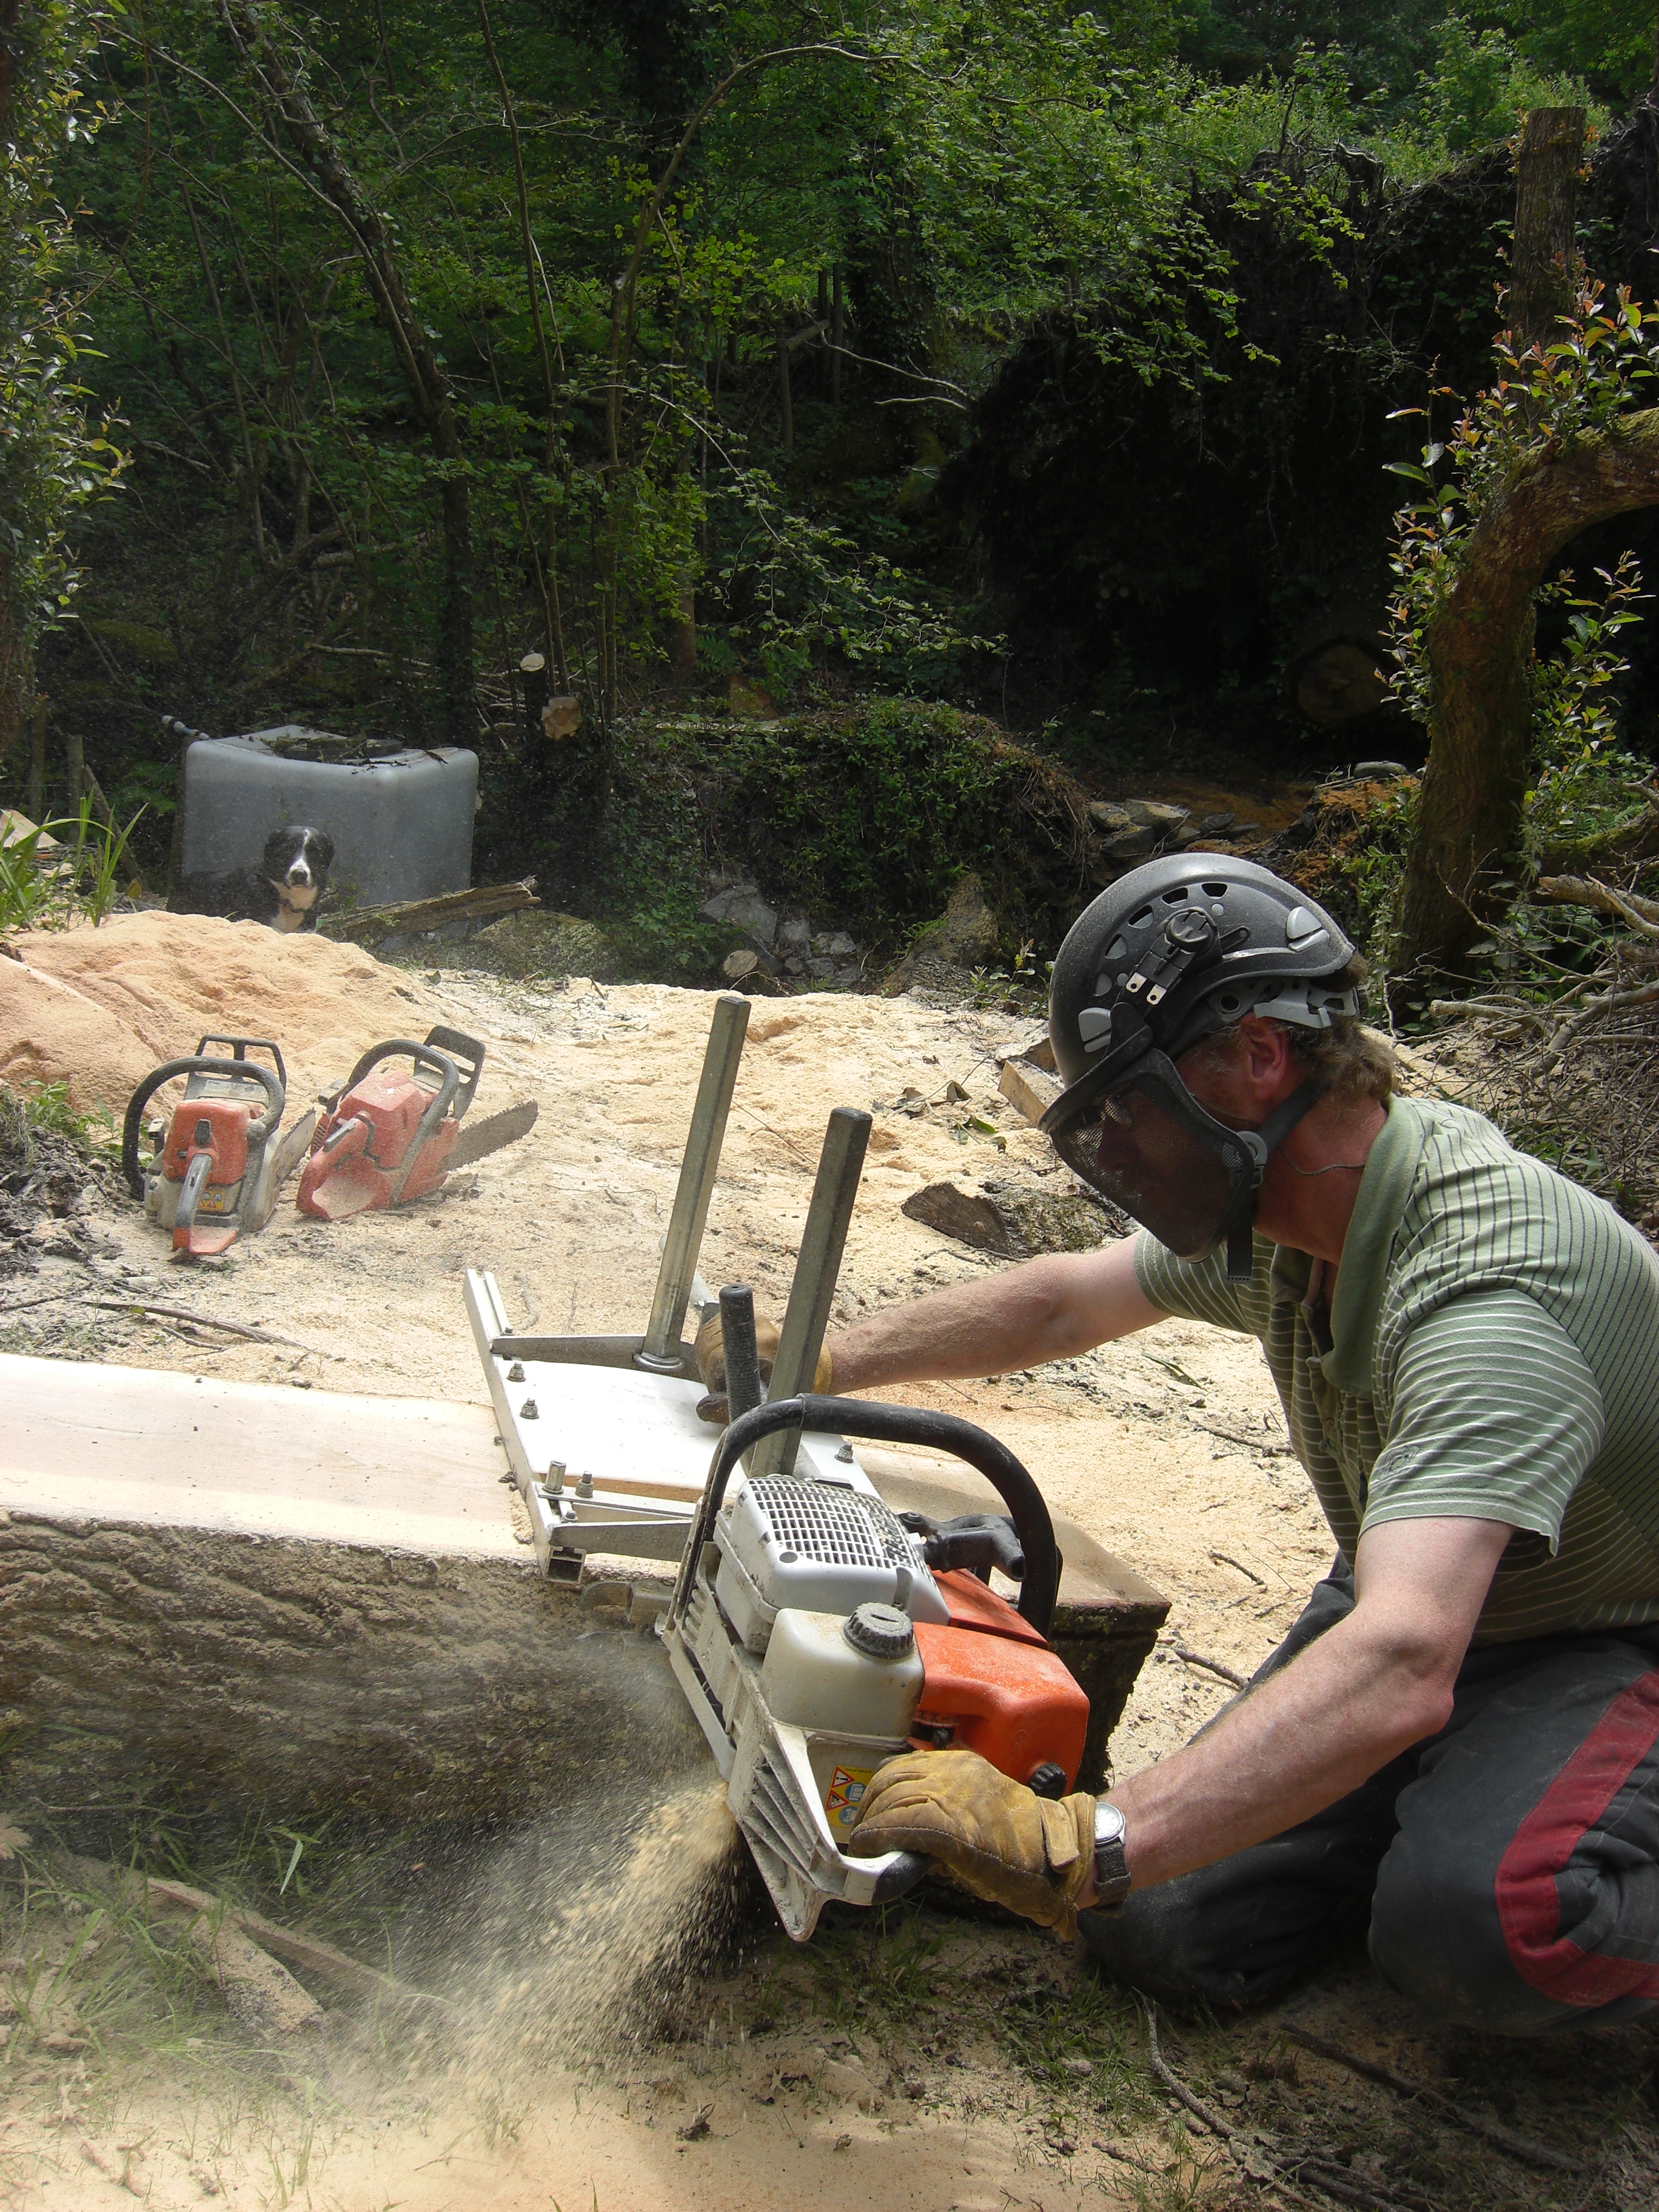
In a piece of real serendipity, the storms that had swept across the area the previous month had brought down a massive sessile Oak on a friend’s driveway. For a half-share in the timber, he was very keen to have someone help him cut it down to usable lumber. In my mind’s eye I was going to get enough wood for the bed, along with all the timber I would need to re-frame the caravan. It didn’t come anywhere close!
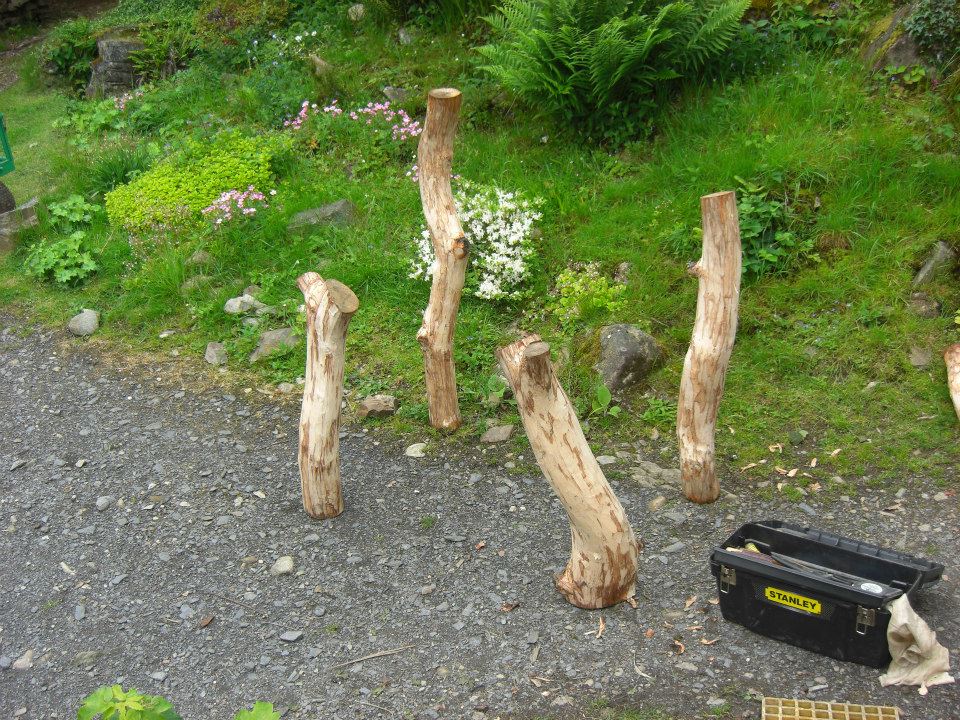
Over the course of three or four hard days, we wrestled the tree into submission and cut various sized planks and spars with a chain-saw mill. I’d gone with a vague “shopping list” of the pieces I would need for the bed, and these cuts were prioritised from my bits of wood. The rest was cut up into sizes likely to be of use down the line. I rooted through the pile of branches pruned from the trunk when it first came down and found some pieces that might do for legs.
Green oak is soft and easy to work, but as it dries it gets harder and harder. As such, the slabs and slices were cut into square edged planks on a table saw as soon as possible. The wood was then stacked, with small spacers between layers, in a wood-store to season, and the bark was cut from the “legs” to help them dry out.
Making a rustic oak bed – May ’15
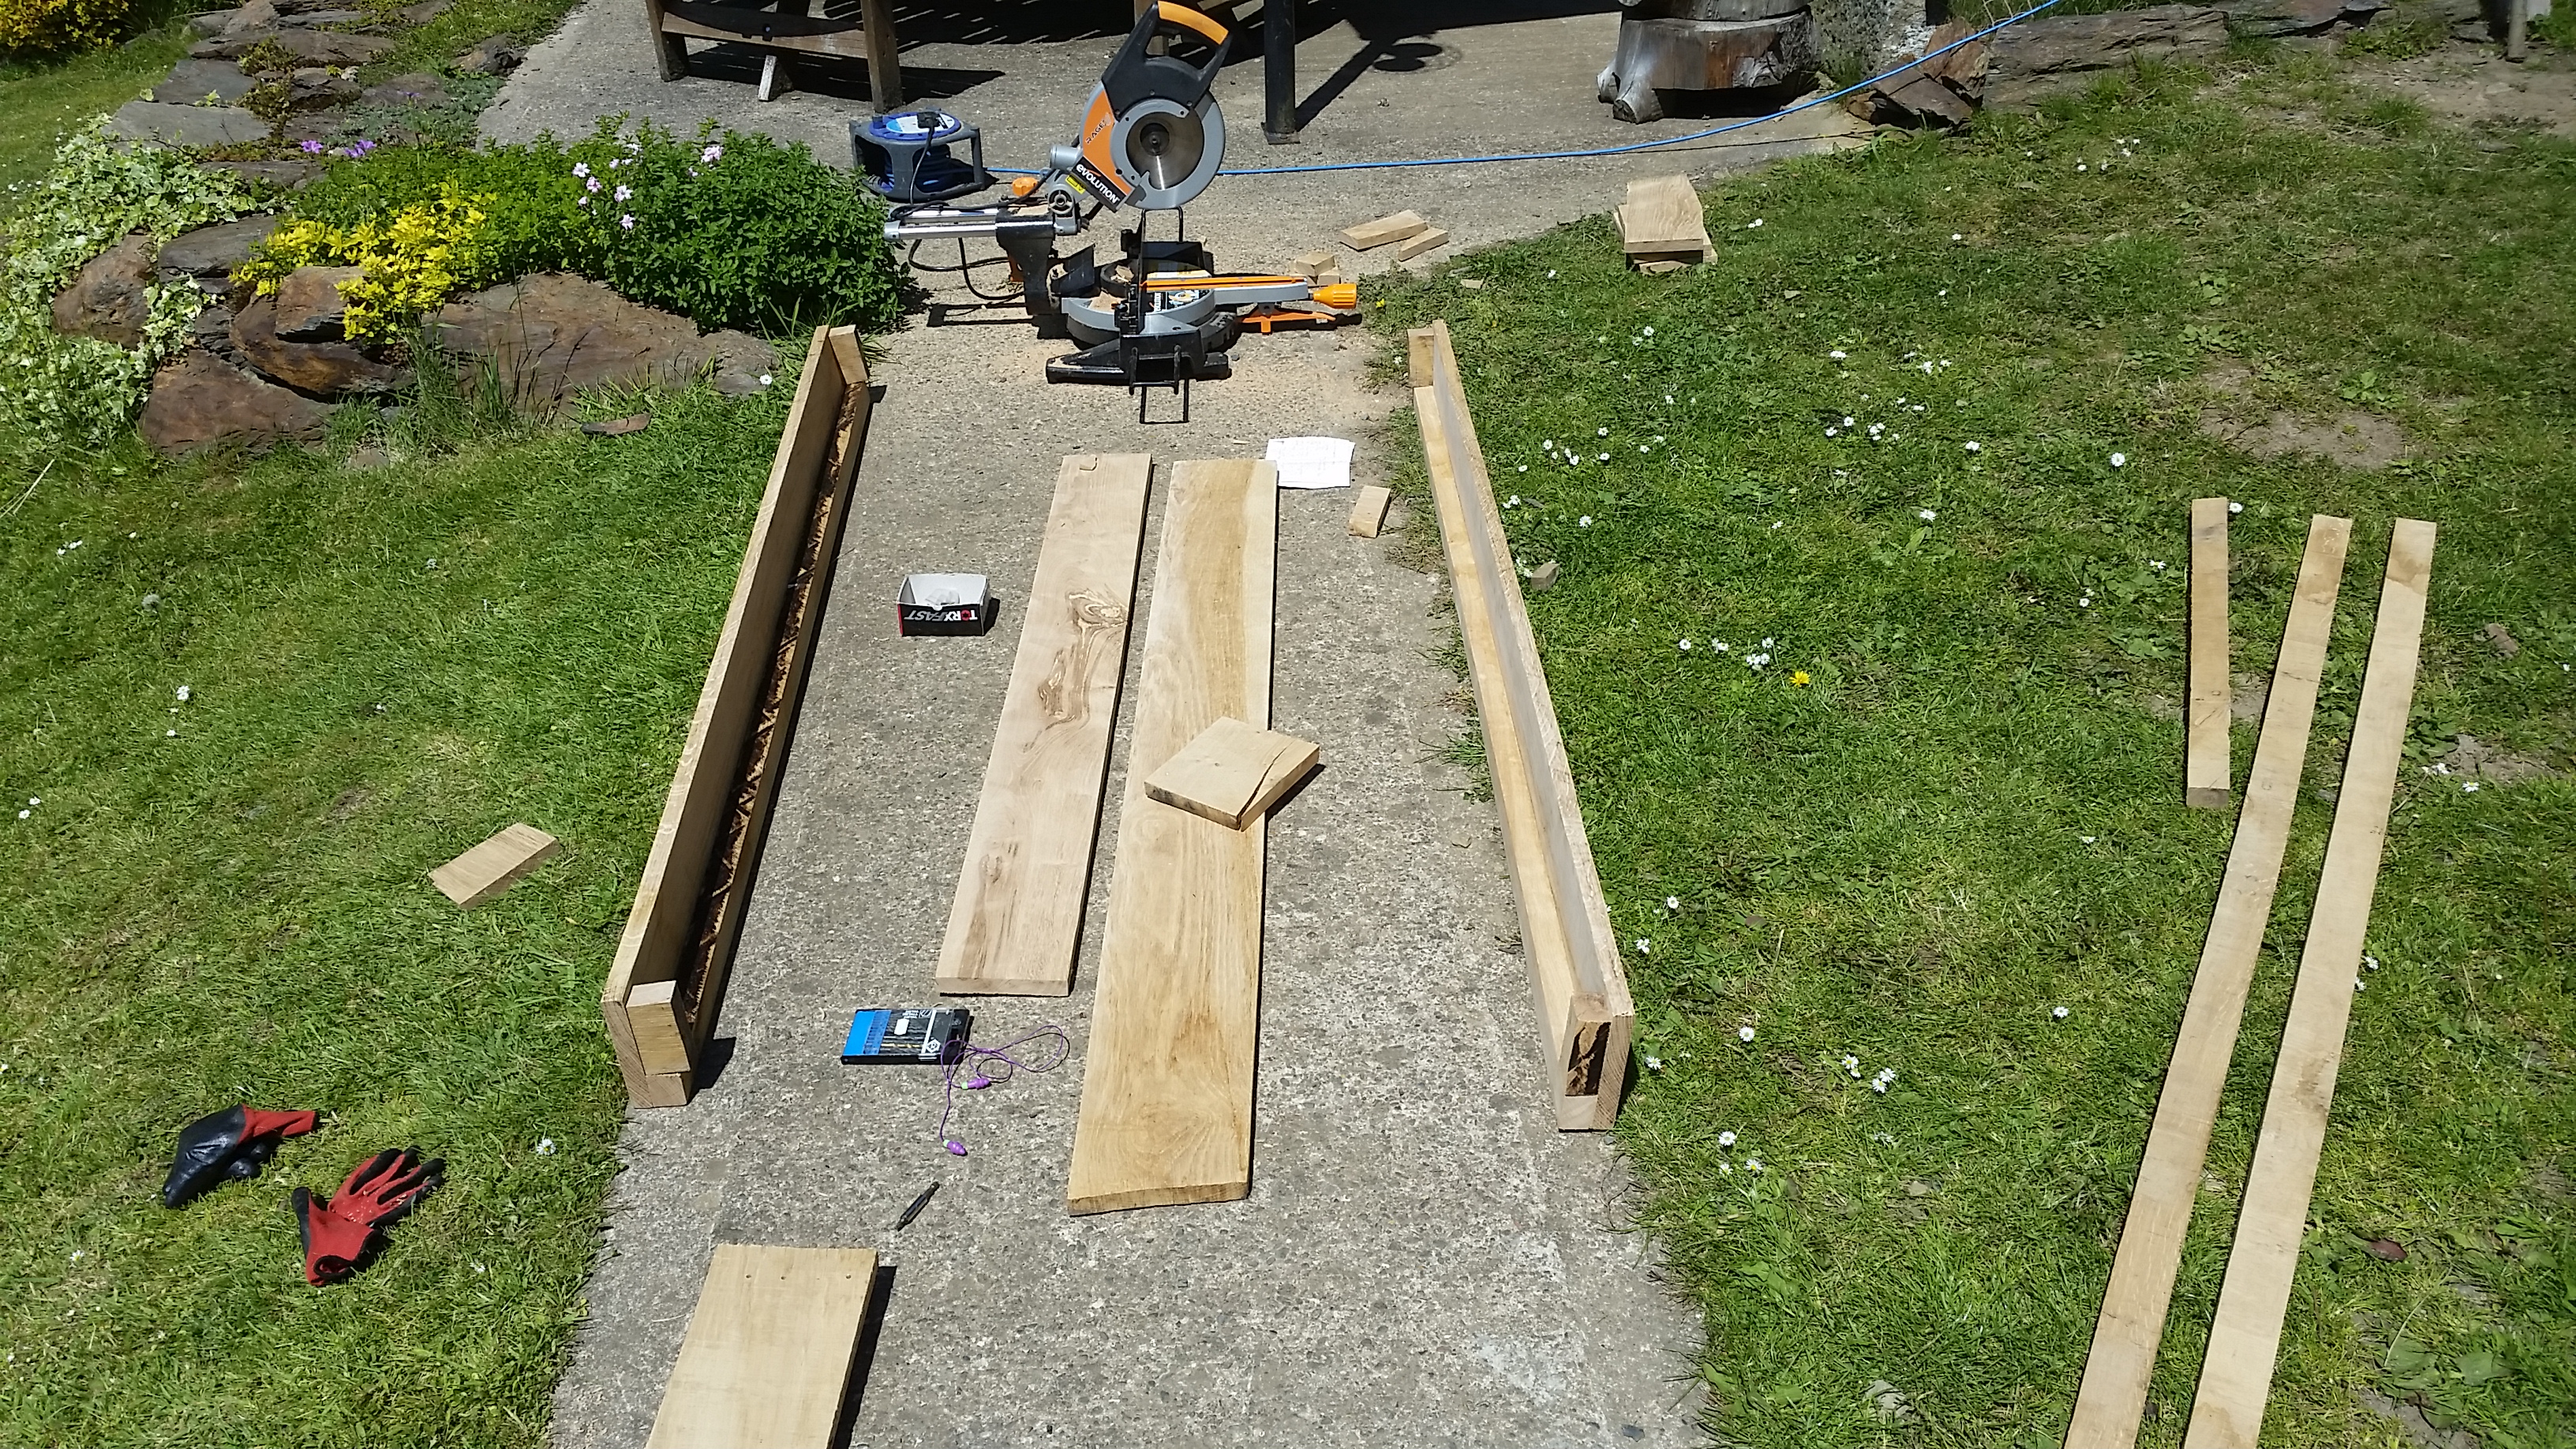
With the timber about a year old, it was time to set about preparing it for its final role. The tree that the timber came from was a gnarly weather beaten specimen, and “straight grain” was not a feature so the first task was to weed out the planks that had warped beyond reasonable use. Others had short sections of straight-ish timber that could be of use, and thankfully there were enough long flat bits to make the bed sides.
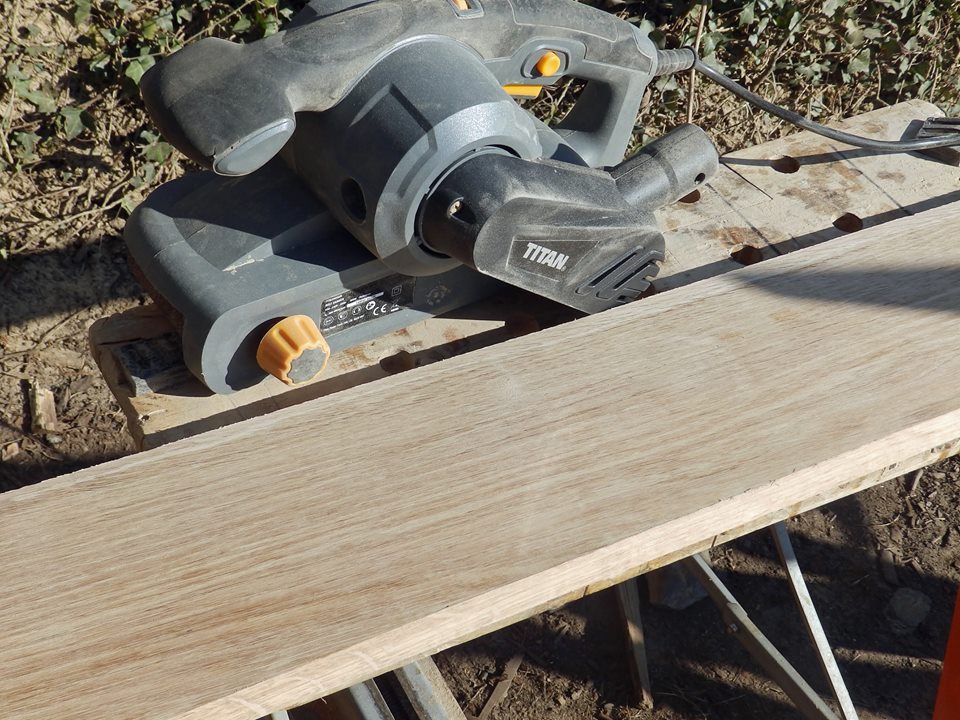
I have to confess to still having not mastered cutting a straight edge on a table saw, but we tidied up and squared off the planks as best we could. Chainsaw milling leaves a rough surface, so each plank also needed sanding down to a reasonable finish.
The first heart-in-mouth moment arrived when it was time to cut the planks to final length; there really wasn’t enough spare straight timber to afford any kind of mistake but thankfully all went to plan.
The box that formed the main part of the frame was the easy part, and was wrestled into shape relatively easily. I’d originally planned (and cut) oak slats to go across the frame, but these seemed to be better used as caravan floor-boards. Fortunately we had taken down a large Ash tree over the winter and I had some rather nice waney-edged planks that were perfect for the job.
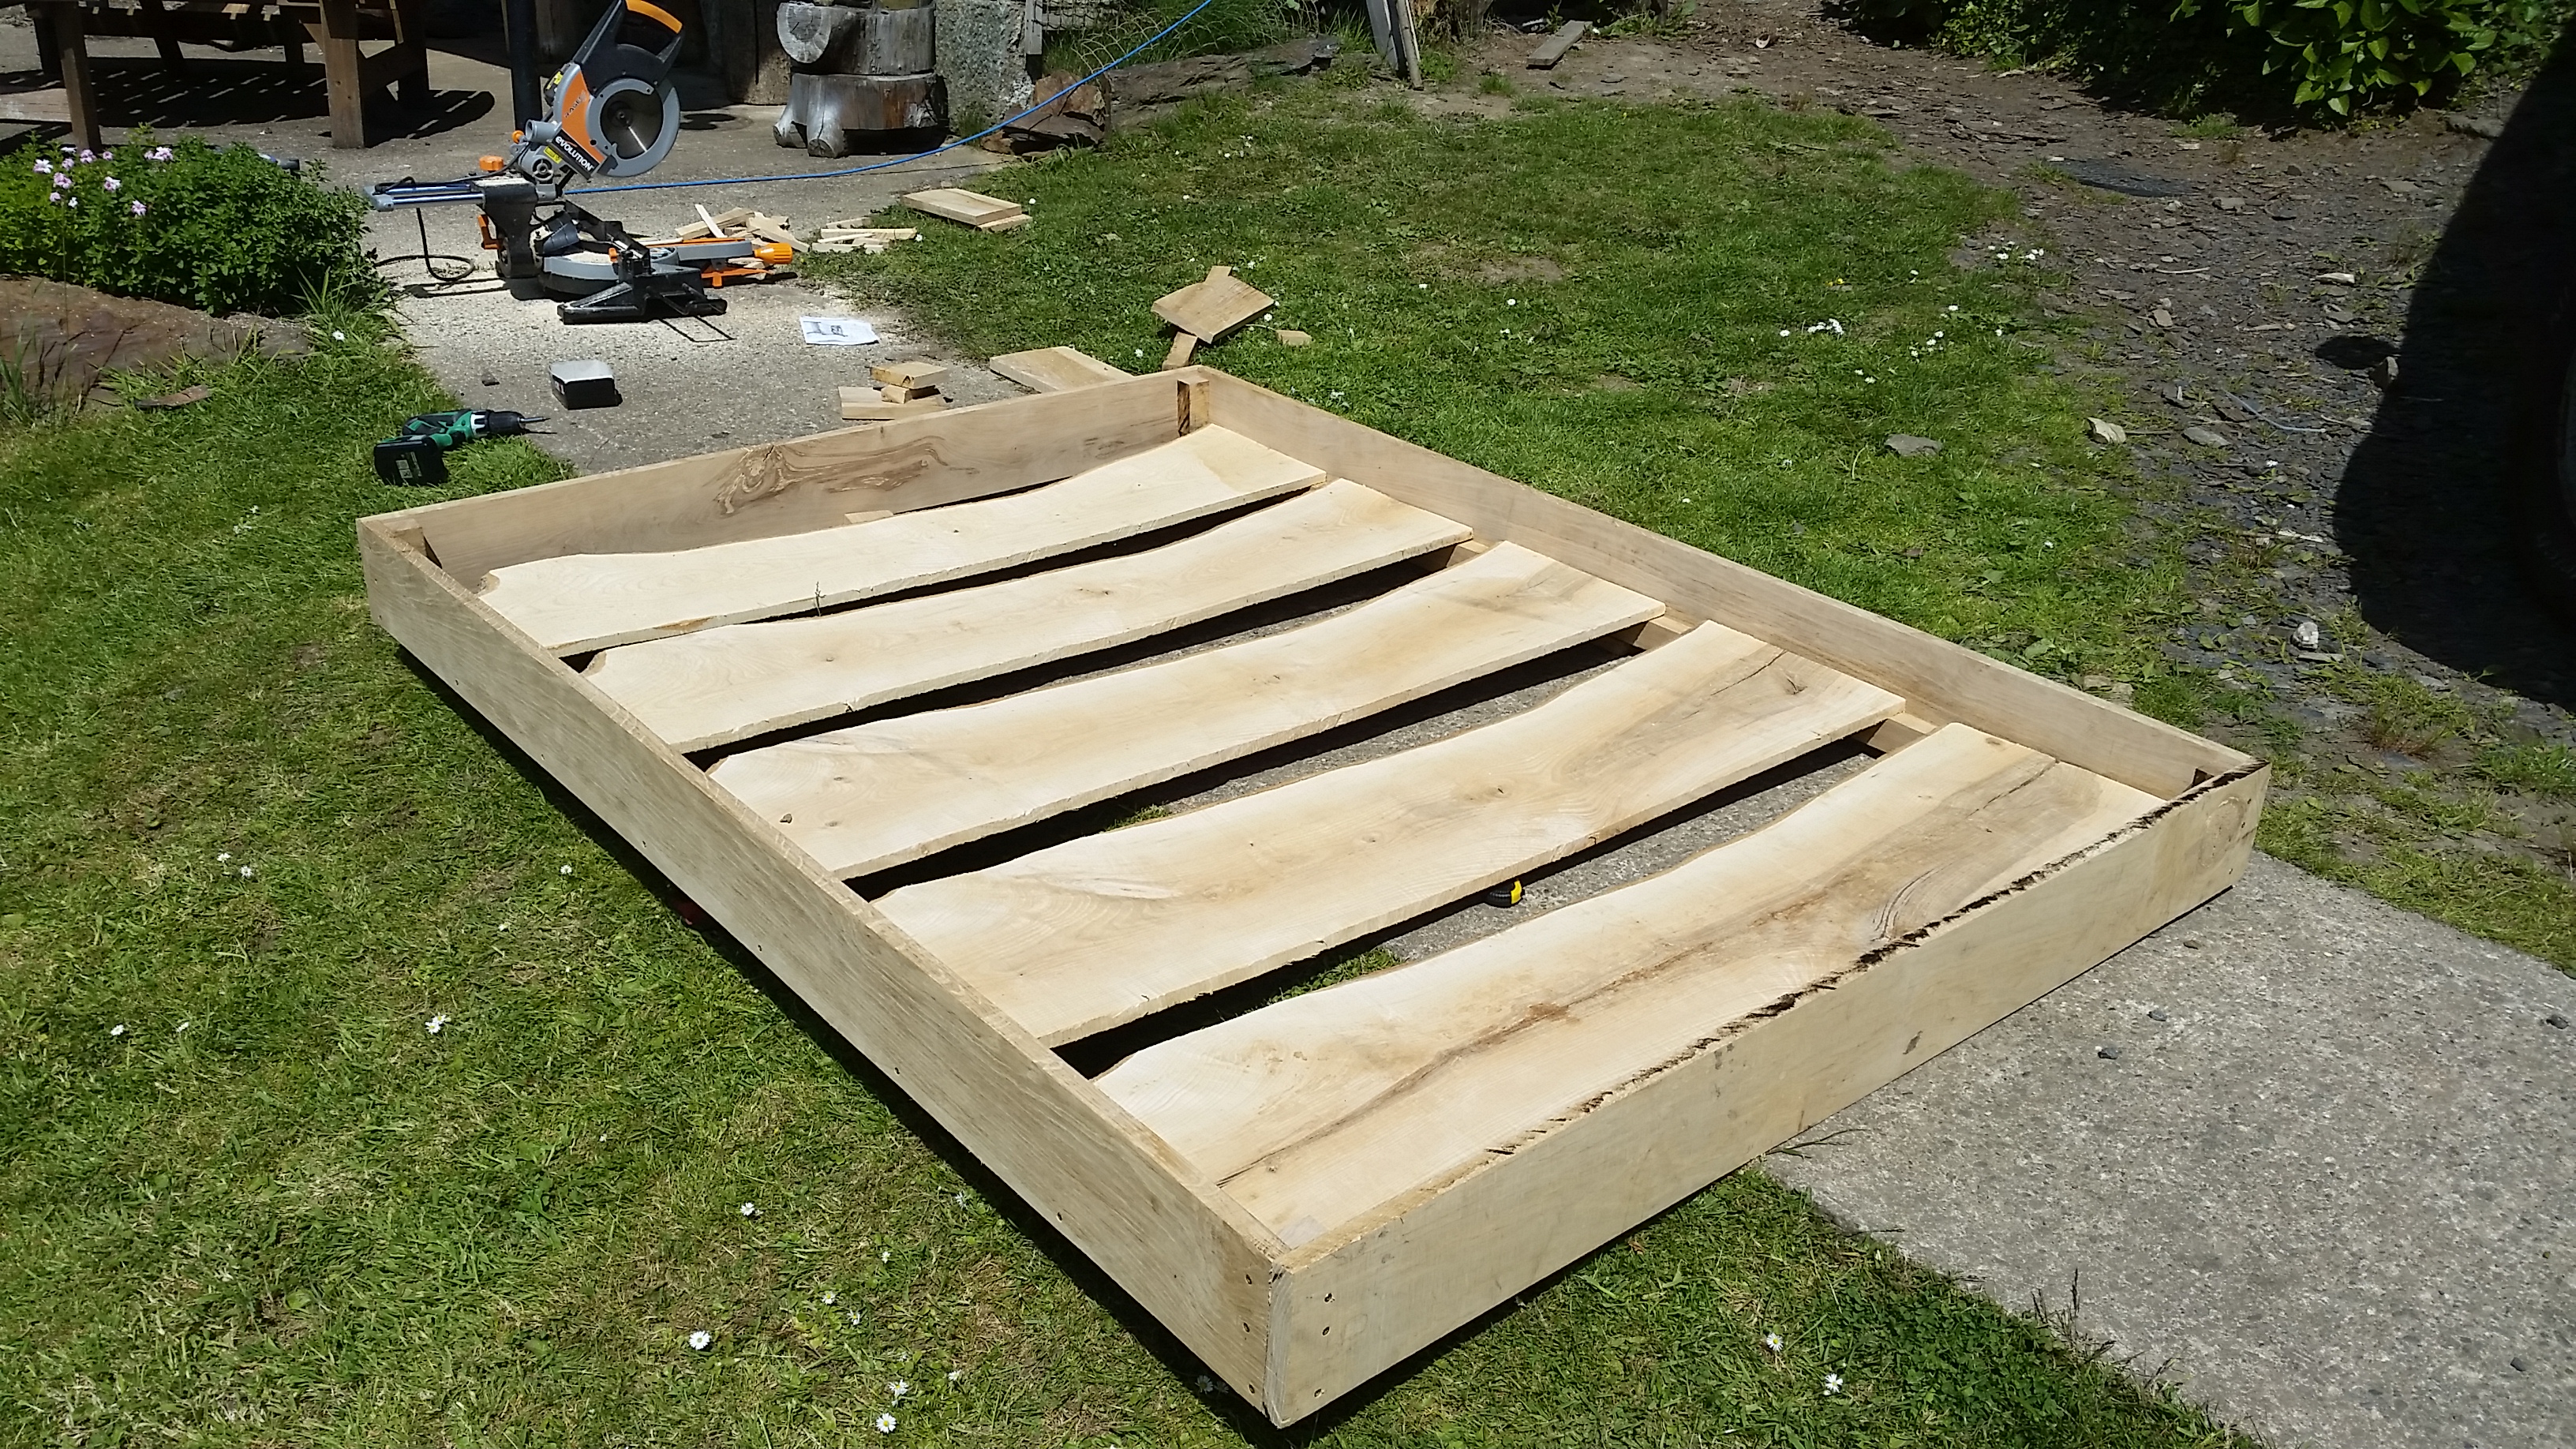
With everything seeming to fit together into a reasonably square frame, the components were numbered and the whole thing pulled apart again for finishing. We decided the slats were too thick, so these were halved on the table saw, and we also added a central spar to support them in the middle.
Making a rustic oak bed – Aug ’15
With the “easy” bit of the frame complete, it was time to consider the more complex issues of the legs and headboard. A particular challenge was finding a reference ‘face’ on an irregular, broadly circular trunk of wood. In my mind at least, having a defined “face” would be central to getting the correct headboard look and ensuring that the cut-outs on which the frame rested were at right-angles to the headboard.
I pondered long and hard about this issue, and although a little simple and inelegant, the solution seemed to work. Starting with the headboard, I laid the uprights on the ground in the correct orientation to each other, and when happy with the arrangement I screwed a square section of plank to the foot of each. This meant that the posts could be easily and accurately rotated through 90 degrees. The posts were then placed in a box frame just slightly bigger than the post. By laying planks over the top of a box, a flat surface was provided to run saws up and down to cut out the slot for the headboard. A similar approach (with a 90 degree rotation thrown in for good measure) enabled the ledge for the frame to be cut.
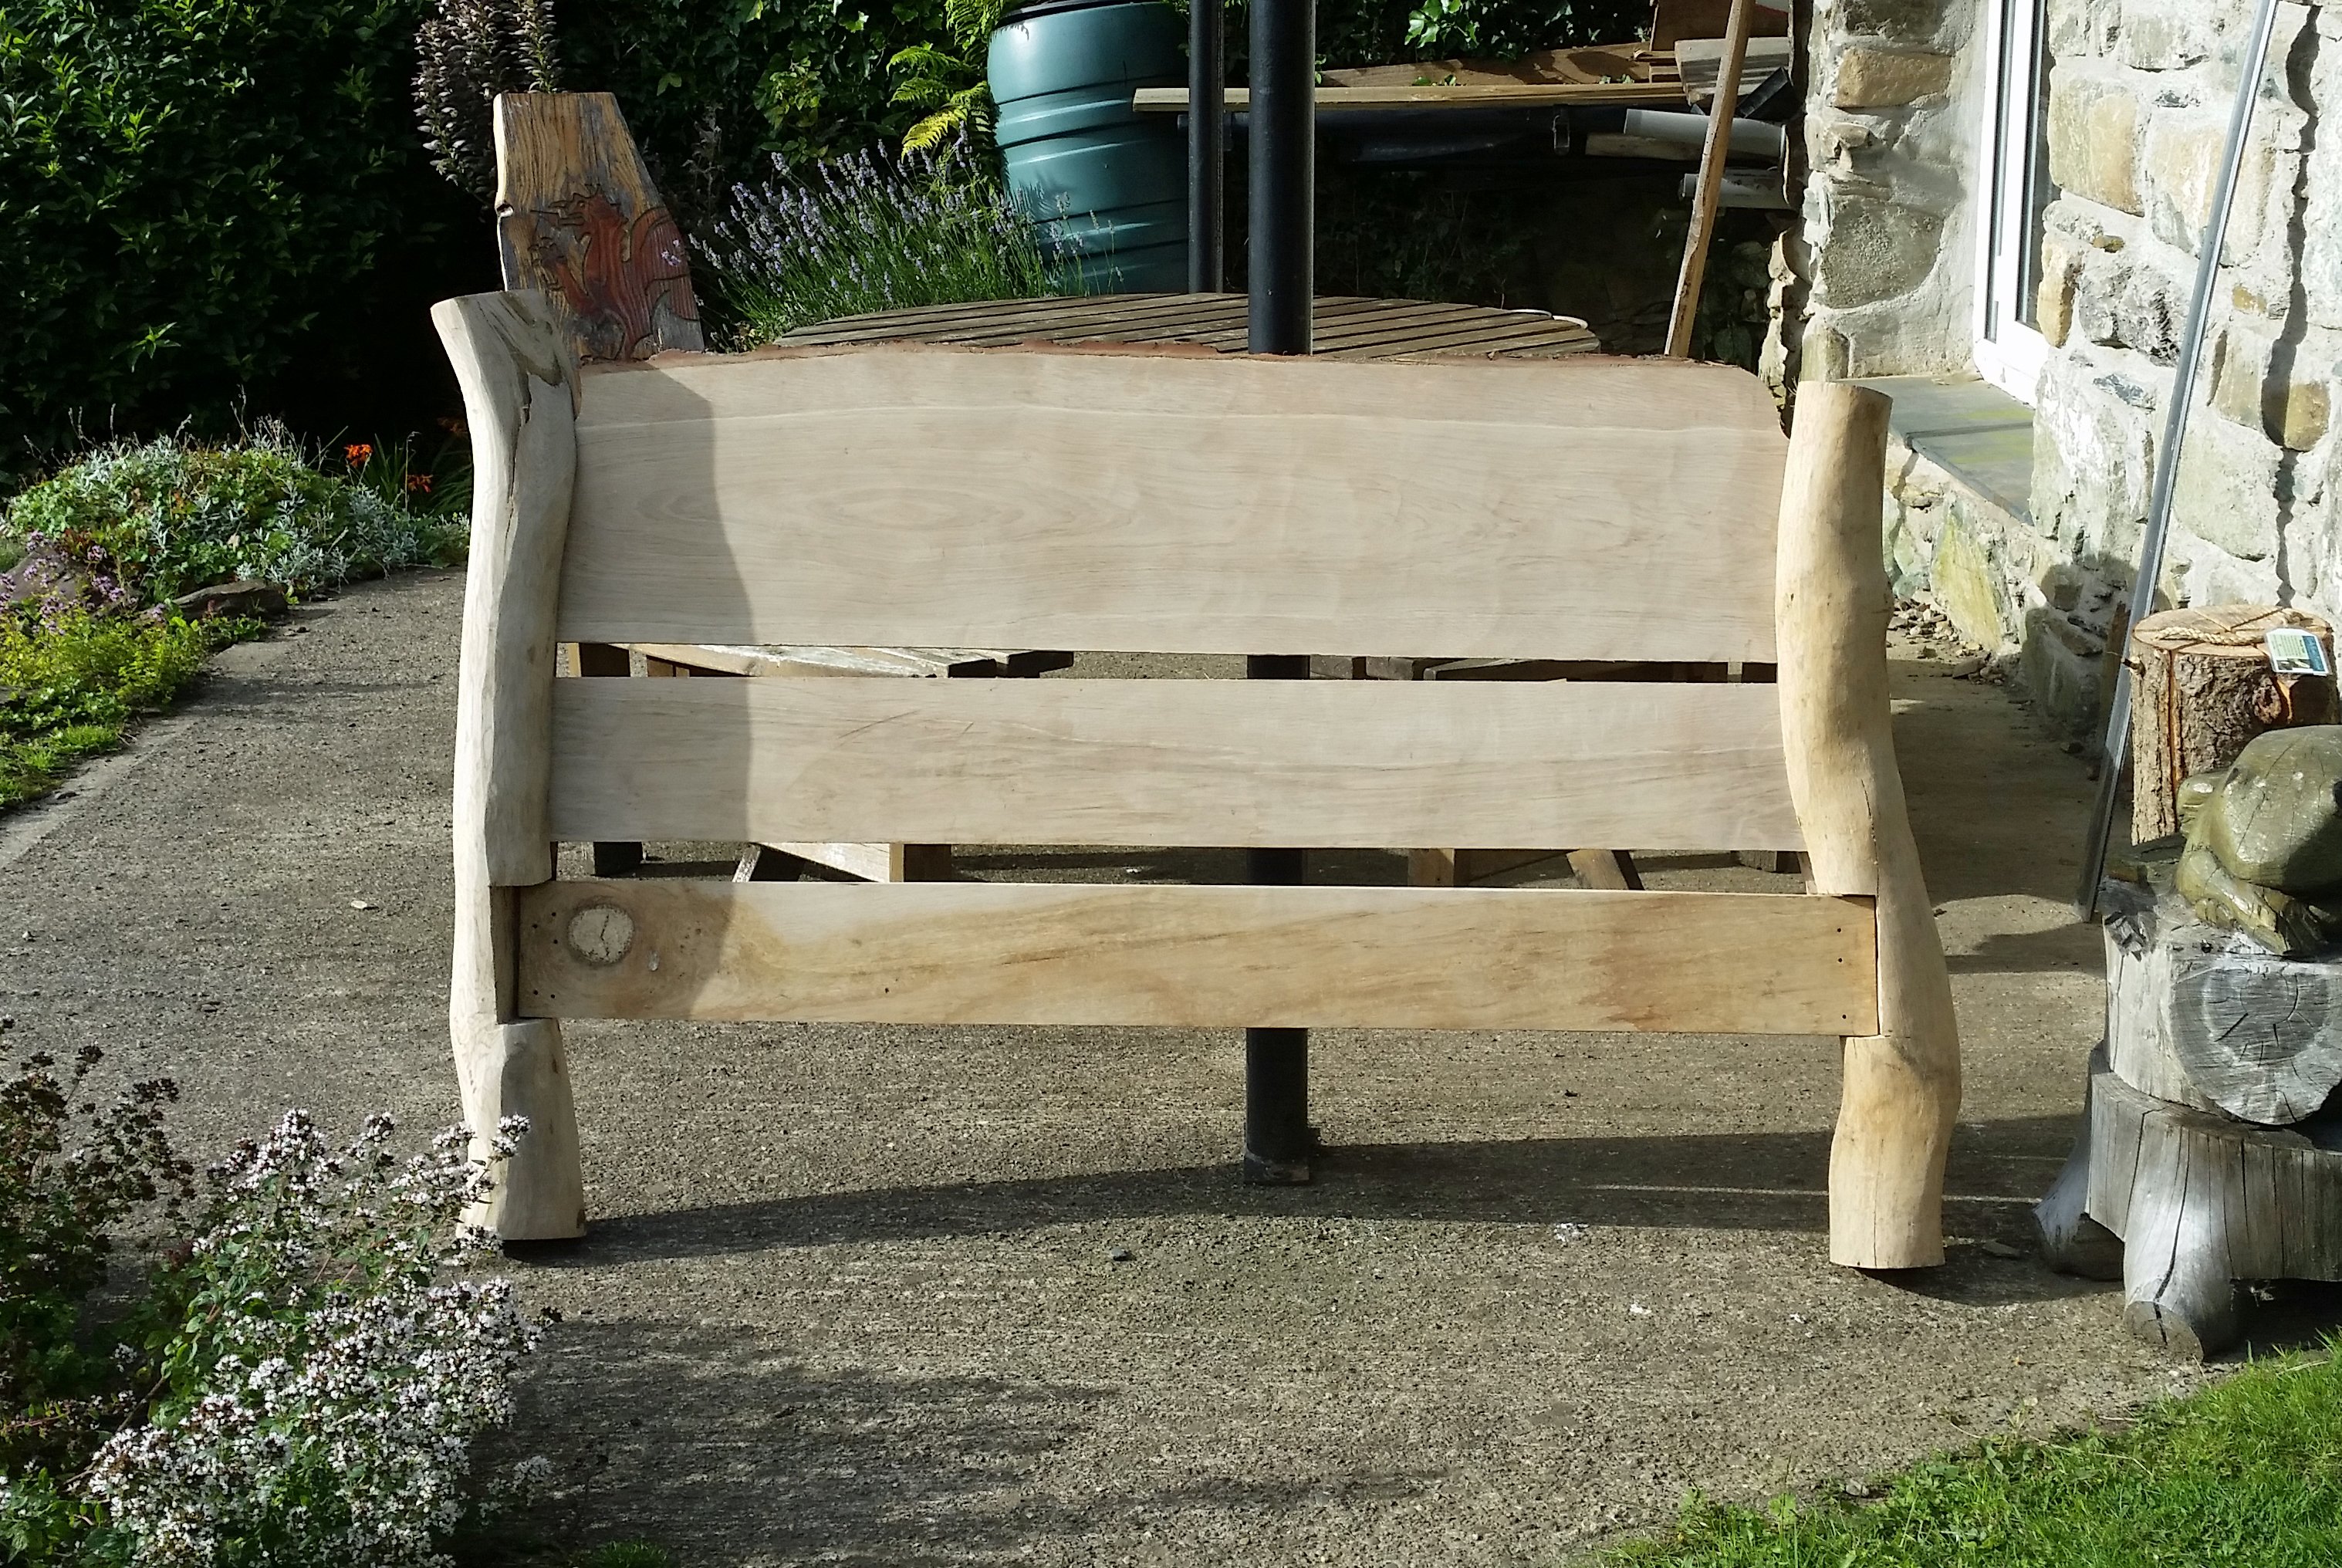
A test assembly of the headboard seemed to give the right look, and, after some minor trims and adjustments, it was disassembled for a final sanding and finishing with Danish oil.
A similar approach to cutting the headboard slots was taken for the two remaining legs, and suddenly the end seemed to be in sight. Alas, the sense of near completion was to prove a little premature as I realised I had no real plan for how to attach the mattress box to the headboard and legs. More head-scratching was to follow, and without an obvious answer coming to light we went back to basics and looked how our existing beds were held together. The secret, it seems, are cot-bolts; those long bolts that slot into a pre-drilled hole on the opposing piece of timber and make contact with a circular nut that sits in a hole at right angles to the bolt hole. All well and good with flat planks pre-drilled on a jig in the factory. Not quite so tidy with circular tree-trunks drilled by hand on a garden path, but we got there in the end.
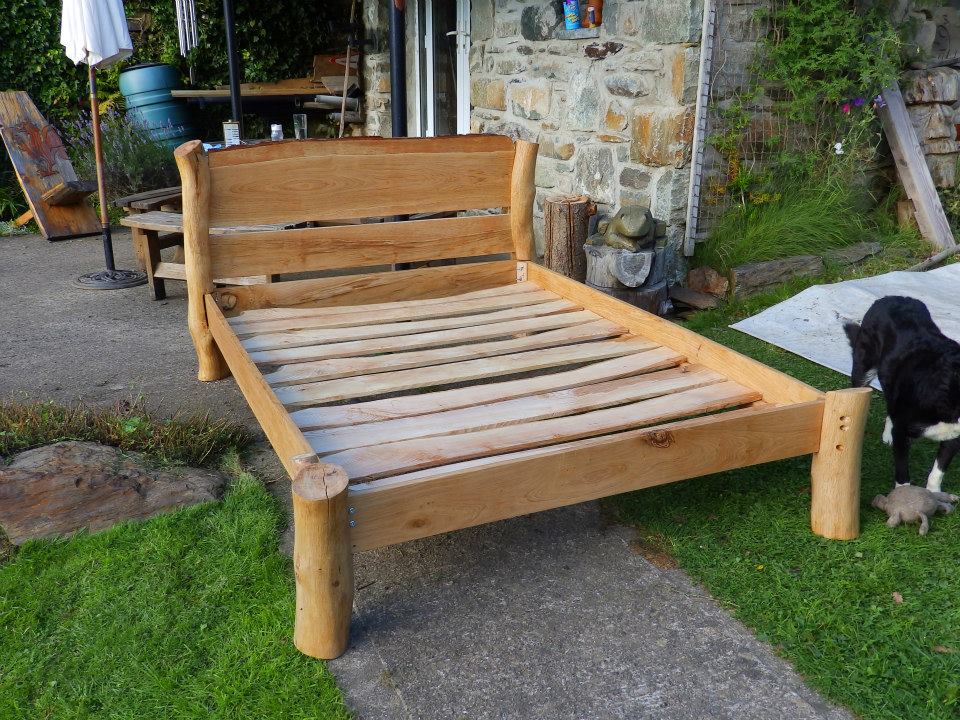
Now all that remains is the small job of installing it into the Showman’s Wagon……..just have to finish rebuilding the bedroom first.